How Lip Fillers Enhance Your Facial Features Without Overdoing It

Lip Fillers San Diego come with a wide range of benefits. They are relatively quick and easy to perform and can deliver a subtle or dramatic change depending on the desired result.

The injection area is sensitive, so patients should avoid smoking or taking blood thinners in the week leading up to their appointment. The injector will apply a topical anesthetic to the lips to numb the area.

Boosting Lip Volume

Beautiful woman gets an injection in her lips.Lip fillers are a safe and effective way to restore fullness and improve the overall appearance of your lips. But they can also have the opposite effect if overdone. A skilled practitioner can use a light hand with injectables to create a natural-looking, balanced result that enhances your facial features without overwhelming them.

Dermal fillers (also known as injectable collagen) are made from hyaluronic acid, which is found naturally in the body. These substances attract water molecules to your skin, causing it to plump and smooth lines. The result is a rejuvenated, refreshed face that looks younger and more vibrant. This can make a big difference in how your face is perceived. A skilled practitioner will take into account your facial structure and advise you on how much filler is needed for a beautiful, balanced look. Overfilling can result in a cartoonish or duck-like appearance, but it is possible to achieve a subtle change by starting small and building up your volume gradually.

The most popular lip filler is Juvederm, which is a silky, gel-like substance that blends seamlessly into your lips to create natural-looking volume. This is especially useful for correcting thin lips, and it is also a great choice for fine lines around the mouth (such as lipstick lines).

Another option is Restylane, which is injected into the lower and upper lips to add volume, smooth out fine lines and wrinkles, and fill in the “lipstick lines” that appear when you smile. Both these products contain a numbing ingredient, so the procedure is comfortable and not at all painful.

There are many other options for enhancing the size of your lips, including lip implants and fat injections. But lip fillers are a safe, reliable and more affordable method for improving the shape of your lips.

After your lip filler treatment, you will experience some swelling and bruising. To speed up the healing process and reduce inflammation, you can apply ice packs to your lips.

Once the initial bruising and swelling subside, your lips will settle into their final shape. Depending on the amount of filler used, it can take up to two weeks for your final results to appear.

Enhancing Lip Shape

The goal of lip fillers is to enhance a person’s natural lips. This is possible no matter their current size or whether they want a slight or dramatic enhancement. The trick is to use the right filler. Hyaluronic acid-based fillers like Juvederm, Restylane, and Belotero are most popular for lip augmentation because they look very natural.

They also come in different formulas designed to address specific concerns, such as fine lines or lip volume. The key is to choose a practitioner who understands the balance of facial proportions and can tailor your lip filler to the specifics of your face.

Trendy techniques come and go in the beauty world, but a skilled aesthetician can ensure that your new look is complementary to your face and jawline. For example, Dr. Alexiades says a famous model came to her recently for help correct a slapdash filler job that resulted in a “pillow” upper lip and a boxy lower lip that didn’t work with her facial structure.

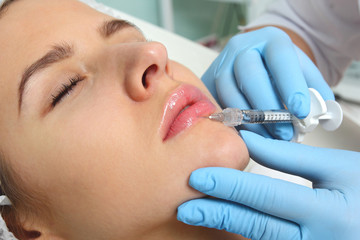
During a typical lip filler procedure, your practitioner will first apply numbing cream or gel to the treatment area to minimize pain and discomfort. Then, they’ll use a thin needle to inject the filler into the targeted areas of your lips. The whole process takes about thirty minutes, and results will begin to appear after a few days as the swelling subsides.

The longevity of your lip filler results will vary depending on the type of filler used, but most last about six months or more. Most experts Allure spoke to say that hyaluronic acid-based fillers, such as Juvederm Ultra XC, Juvederm Volbella XC, and Belotero Balance are the longest-lasting options.

Another option is to add collagen to your lips, which will give them a more plump and firm appearance that can last for years. And there’s the coveted fat transfer technique, which involves taking healthy fat cells from another part of your body and then implanting them in your lips to add fullness, definition, or smooth vertical lines around your mouth.

Regardless of your desired outcome, a good lip filler should look and feel natural—not “puffy,” “funny,” or “overdone.” This is why it’s important to find an experienced provider. You should ask to see the doctor’s previous work before booking a consultation and appointment.

Enhancing Lip Symmetry

While many people use lip fillers to add volume and plump the lips, they can also enhance the symmetry of the upper and lower lips for a more balanced appearance. The key to getting natural-looking results is choosing a skilled practitioner who can tailor the injections to your unique lip size, shape, and desired outcome.

When choosing a provider, ask about their experience with lip fillers. They should be able to provide you with examples of their work and explain how they can help address your aesthetic goals. It’s also important to understand that bruising and swelling may occur following treatment, but this can be minimized by avoiding smoking, drinking alcohol, and using blood-thinning medications like St. John’s Wort, vitamin E, and fish oil in the weeks leading up to your appointment.

Fortunately, dermal fillers offer a safe and effective way to correct asymmetries in the lips. They contain hyaluronic acid, a naturally occurring substance that helps retain moisture and plumps the skin by binding with water molecules. Popular fillers such as Juvederm and Restylane are made of biocompatible materials that reduce the risk of an allergic reaction.

The 54-year-old woman in the example below underwent excision of a basal cell carcinoma and reconstruction with an Abbe flap procedure, which resulted in significant asymmetry between her left and right upper lips. She received 1.6 mL of hyaluronic acid filler to her lower and upper lips to create a more symmetrical upper and lower lip.

Her final image shows a moderate amount of lip enhancement that has improved her symmetry and vermillion border for a more feminine, defined look. While her lips are still thin, they are now more balanced in both length and width.

If you are unhappy with the shape or volume of your lips, contact our office to schedule a personal consultation. Our aesthetic RN will meet with you to develop a plan for treatment that addresses your goals while minimizing risk and complications. We can’t wait to see you smile! Book your appointment with us today.

Increasing Lip Fullness

Lip fillers are an excellent way to add fullness to thin lips. Whether you’ve noticed thinning lips due to age or have always wanted fuller lips, this non-invasive treatment is a great option to enhance your look. The hyaluronic acid injected into your lips will also decrease the appearance of fine lines around the mouth.

During the treatment, numbing cream is applied to minimize sensations. Then, a series of small injections are made in strategic locations to create your desired result. Most patients are able to return to their daily activities immediately after the procedure.

Most clients are interested in enhancing their natural lip shape with lip fillers rather than changing the size of their lips completely. However, lip fillers can provide a dramatic change in size when needed.

A skilled facial cosmetic surgeon or highly-trained injector will carefully examine your lips’ underlying anatomy and muscular movements. This will help them determine where and how much filler to use in order to achieve the results you want, without a “duck lip” or over-filled appearance.

The first few days after your lip filler procedure will be the most uncomfortable. You may experience swelling, bruising and redness. During this time, it is important to avoid rubbing or touching your lips. If you need to touch your lips, a cold compress can be used to reduce inflammation and discomfort. Additionally, it is a good idea to refrain from kissing or drinking through a straw as these actions can cause the filler to shift from its intended location.

After a few days, the inflammation and bruising will begin to subside, and your lips will start to look and feel normal. Your injector will ask you to come in for a follow-up appointment in two weeks so they can monitor the lips and ensure they are healing well.

Depending on the quality of the filler and the injection technique, your lips will last anywhere from six months to a year or more. Injectors are getting better at predicting how long your filler will last, but it is also important to keep in mind that you may decide you’d like additional filler before the previous one wears off.


Water Heater Repair Basics

Water Heater Repair

If you’re experiencing problems with your water heater, you can usually take a few steps to keep the problem from worsening until your plumber arrives. Start by checking your breaker box to see if the breaker is tripped or blown.Water Heater Repair

If it is, flip it back on. If not, call the experts at Denver Water Heater Repair.

Thermostats play an important role in water heater safety. Their function is to shut off the power to your water heater elements if the temperature inside the tank rises to dangerous levels. If your thermostat is faulty, you may experience high-temperature shutdowns. Thermostats can be defective for various reasons, including mineral buildup, clogged vents, and wiring problems. It’s a good idea to resolve these issues as soon as possible to avoid serious problems in the future.

To test the functionality of your thermostat, try lowering its setting. If you do so and notice that your hot water is still too hot, your thermostat might be faulty. If the lower setting still causes your water to heat too quickly, it’s likely time to replace it.

Fortunately, replacing a thermostat is a relatively easy DIY task. After turning off the power to your heater, you can disconnect the wires from the upper and lower thermostats. You can then unscrew the old thermostat from the tank and screw the new one in place with your hands or pliers. To ensure that the new thermostat fits correctly, you can also find a model that’s designed to fit your water heater on websites like Amazon.

If your thermostat is faulty, you can perform several troubleshooting tests to see if it’s actually broken or just not working properly. You can also try bridging two of the terminals together to test their functionality. If your water heater stops cycling when you bridge the terminals, it’s probably a good idea to replace it.

A faulty thermostat is the most common cause of high-temperature shutdowns. However, there are some other problems that can lead to these issues, such as a clogged vent, a damaged heating element, or a rusty water tank. Regular maintenance and cleaning can help prevent these problems from developing. Cleaning the air vent regularly is a good way to prevent mineral buildup, and it’s important to check and replace the sacrificial anode rod every three to five years. You can purchase a new sacrificial anode rod at most hardware stores, home centers, or plumber’s wholesalers.

Damaged Heating Element

If your water heater isn’t producing hot water, the heating element may have burned out. If it’s a gas water heater, the pilot light may also be out. However, this is less likely to be the case since relighting a pilot light takes much more work than replacing a damaged heating element. If you do find that the pilot light is out, it’s important to follow the safety manual carefully and not try to relight it without doing so. This is dangerous and can lead to a fire or explosion. The pilot light is important to keep the gas control valve open, allowing the gas to flow and heat the water. The temperature sensor also needs to be working properly, as does the thermocouple if your tank is gas.

If you have an electric water heater, the first thing to check is that the circuit breaker that corresponds to the water heater has not tripped. Then, press the reset button on the high-temperature cutoff switch located just above the upper thermostat to see if that solves the problem.

The next step is to test the functionality of the heating elements. You can do this by using a multimeter set to the lowest ohms setting. Touch the red probe of the multimeter to one of the screw terminals on the element, and the black probe to the other screw terminal. If the reading is below 30 ohms, the element is faulty and should be replaced. Repeat this process on the bottom heating element if your water heater has two.

You can replace the element yourself if you’re comfortable handling electrical and plumbing work. However, if you aren’t comfortable doing this, or are unsure about your abilities, it is best to have the element replaced by a professional. When purchasing the new element, it should match the length, mounting type (screw-in or flange), and wattage of the old one to ensure a perfect fit.

Once you’ve removed the old element and replaced it, start up the water heater to see if you have hot water. If not, you may need to replace the thermostats or the water heater cutoff switch.

Rusty Tank

A rusty tank is not just unsightly, it’s a sign that your water heater may be about to fail. Even if your tank isn’t leaking, a rusty one exposes the metal to oxygen from the air and this is what causes corrosion and leaks. A quality water heater usually lasts for about 10 years. If yours is close to this age it is a good idea to research replacing it to avoid not having hot water or a flood caused by a failing water heater.

A few rust flakes on the tank’s surface are normal, but if you see a lot of rust or a rusty tank cap, it means that the water inside is corrosive. This is usually a sign that the anode rod is going bad and needs to be replaced.

The anode rod is a piece of metal that goes through the center of your water heater tank. It is designed to attract corrosive elements from the water that would otherwise attack and erode your water heater tank. The anode rod can go bad from normal use, or it can be accelerated by hard water with excessive mineral content.

If you find that your water has a red or brownish tint to it or that you notice a metallic scent when it’s running, this is a sign that there is rust in the tank and/or pipes. Fortunately, this can often be remedied by shocking the system with a chlorine treatment or flushing the system.

To start, shut off the water to your home and drain the water heater. Then open the tank hatch and take a look inside. If there is a lot of rust or flaking you will need to scrub the inside of the tank with a stiff brush and scouring pad. Then rinse the inside of the tank with water, dry it and seal the openings to the tank with GOOD duct tape. Next, pour in a pint of naval jelly or any other phosphoric acid formulation such as milk stone remover or tile haze remover. This will coat the inside of your tank with iron phosphate which is somewhat rust resistant.

Damaged Pressure Valve

The pressure relief valve, or TPR valve, is one of the most important safety components on a water heater. It’s designed to open if the pressure inside of your tank gets too high, protecting your home and your family from a possible explosion. However, this valve can be damaged for a number of reasons, including age, poor installation, and excessive wear. If your TPR valve is damaged, you should replace it as soon as possible to prevent a leaky water heater.

When the valve is working correctly, it will release a little bit of water whenever the temperature or pressure in the tank gets too high. This water will escape through the valve and out of the pipe at the top of the tank, lowering the temperature and pressure back to safe levels. But, if the valve becomes defective or damaged, it can’t release excess pressure and the buildup could cause the tank to explode.

A faulty or damaged pressure valve can also result in a lot of water getting into your home, damaging the piping and water heater itself. This is why it’s important to regularly check your water heater for any signs that the pressure relief valve isn’t functioning properly.

If you hear rattling sounds coming from your water heater, this is a clear sign that the pressure in your tank has gotten too high and that the valve isn’t opening correctly. Excessive debris in the water is another sign that your valve needs to be replaced.

Replacing your pressure valve is a simple process, but it should only be done by a professional plumber. To start, turn off the gas to your water heater or flip the breaker if it’s electric. Next, close the cold water cut-off valve that runs to your heater and drain any water that’s in the overflow pipe by opening a tap or drain valve that’s lower than the location of the valve. Then, use a wrench to unscrew the old valve. Measure the distance from the bottom of the tank to the overflow pipe and cut a new length of 3/4-inch CPVC pipe to that measurement, making sure it matches the diameter of the valve’s exhaust port. Screw the new valve into place, wrapping Teflon tape around it as you do so.

Dumpster Rental Basics

Dumpster Rental

People need Dumpster Rental Roanoke to get rid of large amounts of waste and debris. They may need them when they are doing renovation or construction projects; moving to a new house; or organizing a neighborhood cleanup.Dumpster Rental

Your location and the landfill’s dumping costs play the biggest role in the cost of dumpster rental. It also depends on what you’re disposing of and whether there are any special fees for hazardous waste.

The cost of dumpster rental can vary widely depending on a variety of factors. These include size, location, and timing of the rental. In addition, some companies may charge extra for certain types of trash or additional services. It is best to ask about these charges before making a decision. Then, you can avoid surprises down the road.

A few common fees to watch out for include recycling and landfill costs, prohibited items, and late fees. These charges can add up quickly, so it is important to read the fine print and understand them before renting a dumpster. Adding prohibited items can result in an extra fee for sorting and processing them, while landfill fees are usually for the transportation of waste to the appropriate site.

Dumpster rental prices also fluctuate according to the type of trash you’re disposing of. Some companies will charge more for construction debris than for yard waste or general trash. To minimize these costs, try to limit the amount of garbage you’re putting in your dumpster.

In addition, you should be aware of any fees or deposits associated with your dumpster rental. Most dumpster companies charge a flat fee to drop off and pick up the container, but some will have an additional fee for larger containers or special services. Also, some cities require permits for residential dumpsters, and these can be expensive.

One way to save money on a dumpster rental is to split the price with a friend or neighbor. This is especially useful for large projects, such as home renovations or cleanouts. Just make sure to discuss the details of the project with each other and decide on a fair division of the costs before agreeing to split the rental. This will ensure that you’re not paying more than necessary for the rental. It will also help to avoid any misunderstandings down the line. Some companies may even offer discounts to military members, seniors, and first responders.

Regulations

A dumpster rental is a great way to get rid of bulk waste that cannot be put out with residential trash collection. However, there are many local and state regulations that apply to dumpster rentals. For example, some locations may prohibit electronics from being thrown away in dumpsters. Others might only allow certain types of hazardous waste to be disposed of in dumpsters. In addition, some locations require a permit for dumpster rentals. To find out more about the regulations in your area, talk to a dumpster rental service.

Another important consideration is the weight limit of a dumpster. The weight limit is set to ensure that the dumpster does not overflow. This is important because overflowing dumpsters can cause damage to the surrounding property and obstruct traffic flow. Most dumpsters have a weight limit of a few thousand pounds, but there are some that have higher limits. It is important to know the weight limit of a dumpster before you hire one.

The majority of cities adhere to basic guidelines when it comes to dumpster rentals, but some do have specific rules and requirements. For example, some areas might require a permit for dumpster rentals on commercial properties. The process of acquiring a permit varies from city to city, but it generally involves filling out an application and paying a fee. Most dumpster rental services will handle the permit process on behalf of their clients.

In addition to permits, some municipalities also require a license for dumpster rental businesses. These licenses typically cost between $50 and $200 per year, and must be renewed annually. The license is designed to protect the public from dumpster companies that do not follow proper disposal procedures. These permits are not required for small dumpster businesses, but they are a good idea for larger operations.

The amount of waste generated by a dumpster rental business can vary significantly depending on the industry, location and size of the company. For example, a large construction project will produce much more waste than a typical home renovation. In addition, some industries produce more waste than other industries, and the amount of waste will affect the price of a dumpster rental.

Safety

When you rent a dumpster, it’s important to take safety measures. This will help prevent injuries to you and others who are working around the dumpster. The best way to protect yourself is to wear a hard hat and eye protection. It’s also a good idea to wear gloves and sturdy footwear. Also, make sure that the area is clear of low hanging branches or other objects that could fall on you. In addition, it’s a good idea to ask the dumpster rental company about any safety requirements that are necessary for your project.

Another important thing to consider is the size of the dumpster you need. It’s important to know the exact amount of waste you will be producing before renting one. This will allow you to select the right size for your needs and avoid overspending. Additionally, you should also know whether there are any additional fees that may be incurred if you go over the estimated weight limit.

It’s important to know the laws in your state regarding the disposal of hazardous materials before renting a dumpster. Some items, such as car batteries, can be toxic to the environment if they’re not disposed of properly. You should also ask your dumpster rental company if they have any policies about separating these materials from regular waste.

Finally, you should also find out if there are any fees associated with the use of a dumpster. These can include fuel surcharges and out-of-town tipping fees. It’s a good idea to get an estimate from several dumpster rental companies and compare the prices. This will help you find the best deal.

Lastly, it’s important to keep in mind that you should not walk inside the dumpster while it’s filled. Doing so can cause serious injuries, and it can also lead to property damage. It’s also a good idea not to try and lift things that are too heavy. This can lead to back or arm injuries. It’s also important to use a stepladder when lifting heavy objects, and to never throw anything over your head.

Availability

A dumpster rental business provides a valuable service to both residential and commercial customers. A customer rents a dumpster, fills it with debris, and then the company picks it up. This saves time and money that would otherwise be spent on back-and-forth trips to the local landfill or hauling materials to the curb. The service is especially helpful when a home or business undergoes a major renovation or cleanup. It can also be useful when a large number of homeowners organize a neighborhood cleanup effort.

If you’re interested in starting a dumpster rental business, it’s important to understand the challenges involved. First, you’ll need to secure financing for your business. This will cover the cost of dumpsters and trucks, as well as your other operating expenses. Once you have this in place, you can begin to develop your business plan and research the market. You’ll need to identify your target market and examine competitor offerings, prices, and reputations.

Many cities require a permit for dumpsters placed on the street, but this depends on the size and duration of the dumpster rental. The city’s public works or building department will have more information on the process for obtaining a permit. In some cases, you’ll be able to avoid the permit fee by placing the dumpster on your property.

There are several different types of dumpsters available. The most common are roll-off dumpsters, which can be rented for a week or more. They’re typically used for construction and demolition waste, such as wood, concrete, and roofing materials. They can also be used for cleaning out garages or sheds. A dumpster can also be a good choice for large cleanup projects, such as a complete bathroom or kitchen remodel.

Finding a local dumpster rental service that’s right for you is possible, from family-owned independent companies to national chains. A local company can offer personalized, responsive customer service and may charge lower prices than a national chain. However, a national chain may have a larger budget and the inventory to handle a wider range of needs.

What You Need to Know About Backflow Testing

Backflow Testing

Backflow testing is a crucial process that keeps dirty water from contaminating clean drinking water. It’s also a requirement for many homeowners and is generally done by a licensed plumber.Backflow Testing

Backflow tests involve closing and opening several valves while checking a few pressure gauges. Fortunately, there are tools to streamline this process. Consult Plumber The Woodlands for professional expertise.

Backflow prevention devices are used to prevent contamination of potable water supplies. This means that they prevent any chemicals, toxins, or debris from flowing back down a water supply line into homes, businesses, or city water mains. If you’ve ever noticed discolored or murky water in your sink or shower, this could indicate that your backflow preventer isn’t working properly.

There are many different types of backflow preventers, and the type you’ll need will depend on the degree of risk involved. A low-hazard cross-connection may create a nuisance or be aesthetically objectionable but wouldn’t pose a health hazard, while a high-hazard cross-connection could introduce organisms that cause illness or death into the public water system.

When you purchase a backflow device, the manufacturer will include a label that indicates what kind of backflow it protects against. The most common kinds of backflow preventers include atmospheric vacuum breakers, double-check valves, and reduced pressure zone assemblies (RPZ). Atmospheric vacuum breaker devices use a spring-loaded check valve to seal off the backflow area when the water flow is in a downstream direction. They protect against both backsiphonage and backpressure, but don’t protect against reversal of the direction of flow caused by a change in pressure. Double-check valves use two independent check valves to prevent backflow of contaminated water. RPZ assemblies, which are more reliable than double-check valves, are designed to protect against both backsiphonage and pressure.

Regardless of the type of backflow prevention device you’ve chosen, it is important to have it tested annually by a licensed plumber like Hutchinson. This will ensure that the device is functioning correctly and that your drinking water is safe to drink.

If you’re concerned about the quality of your home’s water, call us today to schedule a backflow test. We’ll help you keep your water clean and healthy!

Test-Cocks

Test cocks are used to attach a backflow test gauge to the backflow assembly during testing. They are available in brass and plastic and can be purchased separately or as part of a complete test kit. Our test cocks are lead free and meet SDWA requirements. They are handleless and use a wrench or screwdriver to open and close. They have a full port ball valve and are designed to be used with Deringer or Magnum backflow assemblies. We also carry a special test cock wrench that fits these valves perfectly. Protect your test cocks by installing caps or plugs when you are not using them.

Pressure Gauges

Pressure gauges are the main instrument used to determine whether backflow is occurring or not. They’re usually a circular dial with a glass or tempered window to allow you to view the measurement. The size of the dial is based on where it’s going to be placed, how frequently you need to read it, and how accurate it needs to be. Dials can range from 1.5 inches to 16 inches, and there are a variety of connection options, too. Most commonly, they connect to the backflow prevention device with NPT (national pipe thread) or G (general purpose) connections.

The main reason backflow testing is required is to protect the quality of drinking water in your area. If the H2O in your system flows backward, it could reach the sewer line and collect fecal matter, pesticides, and other pollutants that are dangerous to humans. Backflow prevention devices prevent this from happening by ensuring that water flows into your property in one direction.

But even if you have backflow prevention devices, there are still reasons to get your backflow tested. Backflow can occur when a pressure change affects the main supply line and allows water to trickle in the opposite direction. This can happen due to fire hydrants, water main breaks, system maintenance, or other events. If it does, it can contaminate the public water supply with impurities that can be harmful to people’s health, including dysentery, typhoid, and Salmonella.

In addition to keeping water clean, backflow tests also help prevent damage to buildings and other structures. When H2O travels backward, it can suck dirt, fertilizers, pesticides, and other pollutants into plumbing systems, which can lead to corrosion. This can cause leaks and other serious problems for your home or business.

A certified backflow tester will isolate the backflow preventer valve during a test to ensure that water isn’t flowing backward while he or she performs the test. They will also use specialized equipment like gauge assemblies and test kits to measure water pressure, check for contaminants, and assess the functionality of backflow prevention devices.

Test Procedures

Backflow tests might seem like a small part of your to-do list, but failing to get them done will only lead to problems down the line. The most obvious problem is that contaminated water could come back into your home’s plumbing. That’s a pretty unpleasant scenario for anyone, but it could also cause damage to your property.

Back flow testing is designed to make sure your backflow preventers are doing their job, protecting you and the public water supply from contamination. That’s because backflow can contaminate the main water supply with things like fertilizers, pesticides, human waste, and harmful chemicals that might find their way into your property’s plumbing and irrigation systems.

A backflow test makes sure your backflow prevention device is working properly by letting a certified tester take a look at the pressure of the system and its gauges. They’ll start by shutting off your water service, then open and close valves on the backflow prevention device. While they’re doing that, they’ll take a look at the pressure and record the results.

The test procedures vary depending on the type of backflow preventer. For example, a backflow test for double check backflow preventers needs to be performed differently than an air gap test. Testers will use a combination of valves, pressure gauges, and test cocks to test each aspect of your device. They’ll also test for signs of backflow, including changes in the gauges and a lack of an air gap between potable and non-potable water.

This can be a pretty complicated procedure, which is why it’s best to hire a professional plumber to handle it for you. A qualified Kiddco plumber will be able to ensure your backflow preventer is tested correctly and that the results are submitted directly to your local water utility company. They’ll also be able to handle the process of temporarily disconnecting your water service when necessary. This is a vital step in the test, and you shouldn’t try to skip it or you could face fines and potential water shortages down the line.

Types of Snow Removal Attachments

snow removal

Snow removal is the act of clearing snow. It’s usually done on a larger scale by cities. They dispatch teams immediately when a snow forecast is made. The first to hit the roads are gritters who plow and spread salt. The salt lowers the freezing point of the snow and ice and gives vehicles more traction. Check out Vantaoutdoors to learn more. 

Winged Blade Plow

The winged blade plow is an ideal solution for snow removal teams who need to be as efficient as possible with their time and equipment. This type of plow features individual, hydraulically controlled wings that extend outward from the blade for increased scooping capacity. The wings can be extended or retracted at the touch of a button in the cab, and they help users move more snow in a single pass.snow removal

With a simple operation and straightforward design, winged blades are easy for all levels of snow removal operators to use. They also feature fewer moving parts than other blade styles, making them less likely to break or become damaged. They are best suited for residential snow removal, clearing driveways, and small properties.

Fully hydraulic-controlled wings allow users to angle the wing for windrowing, which helps reduce spill off and allows for a full pass with minimal blade overlap. They can also be positioned to scoop for greater efficiency in large parking lots or areas with lots of obstacles like cities.

If you’re looking for a versatile plow to improve your operations, the Henderson Extendable Wing is an excellent choice. This wing takes up less chassis frame rail and tucks back for easier, more compact storage. It’s an affordable, effective way to increase the reach of your snowplow with a quick and easy install.

To get the most out of your winged plow, it’s important to know how to use it properly. Start by evaluating the types of snow your area typically receives and creating a plan for clearing those spaces before each storm hits. This will help you avoid damage to your equipment and make the most of your plow’s capabilities.

Once you have your plan in place, take some time to practice and learn how to operate your new plow. This will save you time and money in the long run and ensure your crew is ready to go when the first snowfall arrives. Before the season starts, take pictures of key areas and put up signs to mark them for drivers. This will help you reduce the risk of damaging lighting, signs, and other outdoor decorations near your property.

V-Plow

A V-plow is one of the more versatile options for snow removal. It is often mounted on a motor grader, and contractors like it because of its ability to plow in long stretches of road without losing power or efficiency. If you choose this option, be sure to select the correct blade width and add a plow shoe kit to improve your results. These are available at The Rugged U and will improve your scrape by providing a cleaner surface when back-dragging the plow.

You can also add a box plow to your truck for snow removal, but be sure to check the vehicle’s GAWR (gross axle weight rating) and the payload capacity of the plow. This will ensure your vehicle can handle the load of snow and provide ice control for roads, highways and parking lots.

For driveways, choose the V-position for your first pass and the scoop or angle position for widening the lane. When using the V-position, a good rule of thumb is to use the full blade width for snow two inches thick or less; three quarters for four inches or more; and half the blade for six inches or more. Be careful not to overload your equipment; if you are pushing too much snow, it can damage your plow and your vehicle.

Some operators prefer to use the V-plow in the scoop position to break up large piles of snow or to move snow around. They can also pierce the snow with the blades angled forward, a technique called windrowing that helps clear snow quickly.

A v-plow is also ideal for clearing commercial and retail parking lots. It can be positioned in the scoop, V or angle position and is often used with the snow wings lowered for maximum versatility.

A v-plow can cut your plowing time in half compared to a straight blade, says Snow Magazine. When choosing a v-plow, look for a system that is simple to operate and can be easily modified by the operator according to conditions. The last thing you want is to lose productivity because of a hard-to-use plow.

Snowplow Attachment

The snowplow attachment is used to push, scoop, stack, and back drag snow to complete a variety of winter tasks. It’s available in a variety of widths and comes with steel or rubber edges that work well with the surface type and conditions. It’s mounted further back from the cab than other types of snow removal attachments, offering ideal visibility and maximizing efficiency.

A plow requires a hydraulic system that uses pressurized oil to raise, lower, and angle the blades. It also provides power to float the blades across the ground for better performance. To prevent damage to the plow and loader, it’s recommended that a plow blade not be used with terrain or surface types that exceed its operating capabilities.

It’s a good idea to have a snowplow on hand in case you need to do a quick pick-up or move a pile of snow, especially for emergency situations that can’t wait for a snow removal contractor. You can also use it to plow out parking lots, sidewalks, roads, and driveways with ease, which helps keep business running smoothly during inclement weather.

There are many different snow and material removal attachments available for skid steers, making it easy to outfit your equipment with what you need before winter arrives. Considering the size of your space, your preferred attachments, and how you’ll be using your skid steer will help you choose the right snow attachments for your needs.

To avoid damaging your equipment, be sure to re-rig your machine after each use. If you plan on using your loader for other tasks such as salt and sand loading, consider an attachment that mounts a plow blade directly onto it to keep it ready for the next time snow falls. This way, you won’t have to re-rig your skid steer for each snow clearing job. It can save you time, money and effort in the long run. In addition, it’ll be much easier to switch between attachments in the event you have to clear an obstacle or a change in surface type during a snow removal job.

Construction Professionals Bring the Project to Life

Construction Professionals

Whether it’s a new home or commercial development project, construction professionals bring the project to life.Construction Professionals

They have achieved certain educational and training qualifications that enable them to carry out their roles effectively. For professional help, visit https://concretecontractorcoloradosprings.com/.

Most have a code of ethics and may be members of professional bodies. They often have insurance and undertake continuing professional development.

The complexities of construction projects require the involvement of many different individuals and entities. Project management is the way to manage these multiple, diverse facets and make them all work together efficiently and effectively. This may be done by the contractor, who works directly for the client, or by a project management team hired from outside the company. The key is to have a dedicated project manager who understands the process and can oversee it in order to meet the client’s expectations.

This professional is responsible for creating a plan and managing the project from start to finish. They need to coordinate with all parties involved, including the project architect and designers, to make sure everyone has what they need and when they need it. They are also responsible for establishing plans and procedures for safety, security, and risk assessment. In addition, they need to be able to use complex planning techniques, such as the critical path method and establishing workflow processes.

Before construction can begin, a thorough preconstruction process must take place. This involves building a schedule that sets out what needs to be done, when it should be completed, and how much it will cost. It is essential to avoid delays, which can be costly and cause the entire project to go off course.

Although a construction project manager can anticipate many potential roadblocks, there are some that simply cannot be predicted. This includes environmental issues like soil conditions, endangered species, and cultural artifacts, as well as regulatory challenges such as licensing and permitting. A project manager must be able to quickly respond, find creative ways around these obstacles, and keep the project moving forward.

Design

Design in the construction industry is the preparation of drawings, specifications, bills of quantities, and other design calculations. It involves the generation of concepts for a facility that meet market demands and owner needs. Innovative concepts in design are highly valued not for their own sake but because they contribute to cost reductions or to the improvement of aesthetics, comfort, and convenience as embodied in a well-designed facility. Such innovations, however, require that designers and constructors fully understand the technological complexities, which are often not readily apparent in a conceptual design.

In the past, a project’s design and construction processes operated in separate silos. The resulting adversarial relationships, mistrust, and grudging communication where necessary—if it occurred at all—led to high costs and project delays.

The design-build (DB) process addresses these issues by bringing all of the project’s players together under one contract. Instead of an owner managing two separate contracts with a design company and contractor, the DB process provides one single entity that wears both the “design hat” and the “construction hat.” This leads to streamlined project management, reduced costs, shortened project duration, and superior quality.

The DB process also promotes an environment of collaboration rather than a culture of blame-shifting. In the past, design professionals and construction contractors were reluctant to jointly take on responsibilities such as preparing shop drawings for erecting structural components. Such resistance stemmed from the assumption that these tasks were not part of a professional engineer’s scope of work and that their review was only advisory. This justification was ruled unacceptable by a court in connection with a walkway failure in 1985. The ASCE’s Manual of Professional Practice now recommends a shared responsibility for the preparation and review of shop drawings.

Estimating

Construction estimators are skilled at reviewing project documents, assessing material and labor requirements, and developing cost estimates. They often specialize in estimating costs for particular types of projects, such as civil engineering, architectural, structural, or electrical. As part of their estimating process, they review construction plans and drawings and make allowances in their estimate for possible errors, weather conditions, and other factors that could affect the final cost of a project.

A construction estimator’s first step is to validate the project’s scope of work, which lays out all the tasks that need to be completed to construct a building or infrastructure project. The scope document, along with the building plans and specifications, gives an estimator a starting point to compile a list of all the different materials needed to build the structure, known as a quantity takeoff.

An estimator’s job also involves adjusting standard material pricing data to account for local market conditions. For example, the price of labor to construct a building will vary by region based on local demand, skill levels, and current economic and market conditions. Additionally, the use of certain equipment impacts many other parts of the construction process, which must be accounted for in an estimate.

Estimators may also need to assess the availability of specific materials and determine whether the construction methods required are feasible based on availability, labor skills, and safety considerations. They may also need to consult with a variety of professionals, such as a cost engineer, to ensure that the estimate includes all necessary costs. The resulting estimate is then used by general contractors to include in their bid, which binds them to complete the work for the agreed-upon price.

Contract Management

Construction projects are typically complex and require a wide range of expertise to be completed on time, within budget, and with the desired quality. Effective contract management ensures that everyone involved understands their responsibilities and obligations, mitigates risks, helps prevent disputes, and improves project outcomes.

Efficient contract management requires attention to detail during the contract creation and administration stages, as well as an understanding of different types of contracts and the best ways to implement them. Construction professionals must also be able to negotiate effectively with vendors or clients to avoid potential problems that could impact the project timeline or cost.

Procurement is a crucial component of contract management that includes purchasing (or renting) all the materials and equipment needed for a construction project, from labor to building materials to trucks and tools. Keeping track of these expenses is critical for project profitability. Construction platforms that enable teams to collaborate easily and create a clear overview of costs are invaluable for this stage of the process.

The final step of contract management is ensuring that all parties comply with the terms of their contracts, which may include adhering to schedules and specifications or meeting certain quality standards. Failing to do so can lead to delays, disputes, and even legal action.

The aforementioned roles are not comprehensive, as many construction managers oversee multiple aspects of a single project and often serve as the liaison between clients and architects, engineers, and contractors. Other duties of a construction manager might include reviewing proposals, estimating timelines and milestones, setting project protocols, determining resourcing needs, and ensuring that all contractors are aware of budget and timeline requirements. In addition, a construction manager might need to review and approve change orders or invoices from vendors.

Administration

Construction administration is an essential part of a project that helps ensure that a contractor follows the design specifications in order to meet a client’s needs. Whether it’s a commercial or residential job, construction administrators help keep the building process running smoothly and efficiently. They review submittals, monitor progress, observe contractor work, and provide as-built documentation.

They often have to provide clarifications, so it’s important that they have strong communication skills. They also have to be able to quickly resolve issues and communicate the impact of changes on a budget or timeline. It’s common for building materials to be discontinued mid-project, so it’s important for construction administrators to be able to find appropriate replacements that fit within the project budget.

One of their primary responsibilities is reviewing submittal packages, which are a collection of material samples and shop drawings for each system in the building. They must review these packages to ensure that the contractor is executing the design specifications as outlined in the construction drawings and contracts. They also monitor the progress of the construction to make sure it’s on schedule and within budget. When the building is completed, they put together project closeout packages, including warranties, equipment information, contractor contracts, and maintenance agreements.

Are You Thinking About Homeschooling? Read This Article.

Homeschooling is a great choice if you and your children are prepared to be tough. You should learn from people who have done it and this article can be a great start.

One of the benefits of homeschooling is that you can teach your child in the way that your child learns best. This will improve your child’s success.

You need to think about what area or room you will be in your home. It must be a comfortable room with no distractions. It must have an open area for activities and other materials for writing and writing. You must watch over what your children are doing.

Know the laws in your state are. You can visit the HSLDA online resource to find out your state laws. A homeschooling organization can help prepare you when you’re questioned by the BOA or CPS. The help will be able to give you more than make up for any annual membership fees well worth your while.

Homeschooling is simply a cut above the overcrowded public school systems. This will point out your child is on level with children in local schools or if they need help to catch up.

Your children will need a place with no distractions in which to learn. Choose an area that is separated from the place your child plays. Make sure your children have some place to store supplies when not in use.

Find ways for your child. You must think outside of the box since he is not at school. Meet with other homeschool families and embark on a field trip. Get your child involved in community sports teams. Boy and Girl Scout troops are great for your child to socialize.

With a lot of knowledge in this article, you can now be prepared to get into homeschooling. This will ensure you are giving your kids a quality education they deserve. With your expert planning and teaching, your child will be able to meet all the challenges he will face in life.


You can also visit our other website and post your article.

Rusa Medical Centre, Always Stampin, How To Build A Virtual Assistant Business, Puget Sound Silent Flyers, Bellanova Travel, San Luis Coastal Measured, Electrician-Fortlauderdale, Smerise Collective, Set Pump Fast, VOR Business Training, New Americans Alliance, Vivid Painting LLC, Long Horns Shop, Kitchen & Dining, Product Launchr, Poshe Shop And Ship, Mcarpenter Md, Green Home Builders Of The Triangle, Eartheries, Rebecca Elbaum, Chuckheiney, Scotts Valley Town Green, Germ Tackle, NWP Collection, Freedom Sings Colorado, Organic Gardens Today, Peak Oil NYC, Mexico Infrastructure Projects, Divine Appetite Cafe, Chuva Group, Internet Marketing Here, Sagewood Kitchens, Wyoming Switchboard, Embroidery By Ace, Charleston Your Home, Yard Cardz, Liberty Mutual Research, ISCEBS-Iowa, NJ Dare Officers, Dream Sleep Now

Opening a Hair Salon

hairsalon

The main difference between a hair salon and a beauty parlor is their setting. A hair salon is typically a much larger establishment with a more developed space. Both provide the same type of cosmetic treatments, but a hair salon usually offers more advanced services. Hair Salon Hermosa Beach is more than just a place to cut and style hair. It is also a more upscale, private space. Here are some differences between hair salons and beauty parlors.

hairsalon

A salon’s menu should reflect the type of service offered. For instance, a high-end salon may offer extensions and smoothing treatments. It’s also essential to reflect the latest trends in the industry on its menu. Regardless of the type of salon you choose, there are many ways to make your menu appealing to consumers. For example, you might offer a wide array of color services, including highlights, lowlights, and smoothing treatments.

The types of services you offer should reflect your customers’ wants and needs. If you offer more than one service, you might want to consider adding an express color treatment. This will save clients time and will help you set your prices. Depending on the brand you choose, a trial service might cost $50, and a full-fledged dye-job can run up to $1,500. However, a trial fee for this service should be well worth the added expense.

A hair salon’s services range from color to highlights and lowlights. While most hair salons offer essential services, some offer specialized services for a niche market. For example, a salon may specialize in high-end color or may offer lowlights and temporary coloring. However, these additional services can be more expensive. Besides, the cost of a permanent color service can be much higher. And a salon’s location should be easy to find and use, as it will be the first place people go when they need a haircut.

Before opening a hair salon, consider what kind of services you will provide. The type of service will determine how many beauticians and technicians you will need. The size and number of chairs will also depend on how much you charge for these services. A hair salon that offers only one service may be more popular than another, but it should still be profitable. So, if you’re thinking of opening a hair salon, consider all the different options.

A hair salon’s pricing depends on the type of service. A typical hair salon offers standard services such as haircuts, nail care, waxing, and skincare. But, if you need more advanced services, consider booking an appointment. For example, a salon that offers massages is likely to be cheaper, but it may not be as good for your health. For this reason, a salon that offers massage services is more likely to be profitable. It’s worth it to spend a bit extra money to make sure your clients are happy.

Foot traffic to hair salons has decreased by 60 percent nationwide since mid-April. This drop was the result of lower foot traffic in all of these states. By mid-April, the numbers were back to last year’s level. Although foot traffic to hair salons has fallen in these states, the trend reverses in some areas. Safety and security are two of the top priorities for any business. A good hair salon offers quality services to clients, which both customers and employees will appreciate.

A hair salon should have an updated price list. It will help the customer decide on the price of the services, but it will also improve the search engine ranking. An updated price list will help the customer decide whether to visit the hair salon. A salon with a price list will get more clients and more repeat business. It also improves the search performance of its website. In addition to having a price list, a hair salon website should also include a menu of services.

In contrast, temporary extensions are more affordable for guests. They can be removed at any time. The fusion extensions are more expensive and often made of more premium hair. Hand-tied extensions are less expensive, but they are not recommended for guests. The temporary ones are the most affordable option, but they will also be notified and last only for a few days.